How to Clean Betta Fish Bowl or Tank: Step-by-Step Process
Betta fish are a popular pet and many people choose to keep them in a fishbowl or a fish tank. It is important to clean your betta fish bowl or tank regularly to keep your fish healthy and happy. This article will teach you how to clean a betta fish bowl in six easy steps.
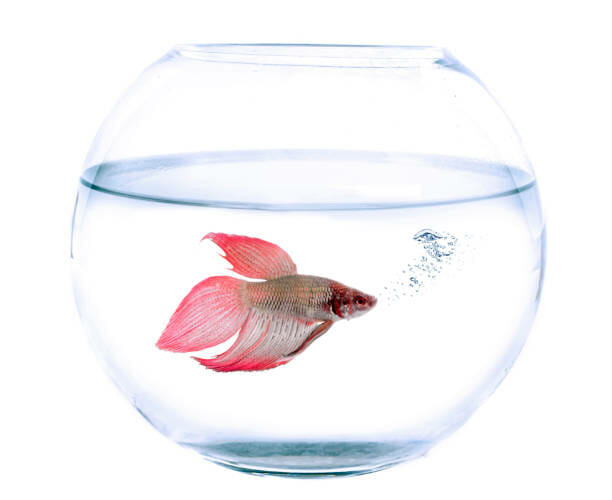
Table of Contents
How to Clean a Betta Habitat: 11 Easy-to-Follow Steps
Step 1: Prepare the Water for Cleaning
One of the best ways to keep your betta fish healthy and happy is to make sure their water is clean. Before cleaning your bowl, it is important to make sure that the water is clean and free of debris. You will need to prepare your water ahead of time to do this. You should use a siphon hose or net to remove any debris from the bottom of your bowl. To prepare the water for cleaning, you can add aquarium salt in equal parts depending on how salty is it inside your betta fish tank and keep this solution at the top level at least overnight. By doing so, we create an environment where bacteria will not be able to grow which means that the water will be free of bacteria and we can safely clean it very well.
Step 2: Transfer Your Bettas
Once your betta fish habitat is prepared, you should now transfer them to another bowl. Before doing so, it is important to make sure that they are completely relaxed and ready for cleaning. This will prevent any stress on their fins while transferring them over which can create stress in young or pregnant bettas. In addition, you should also make sure that they are not in danger of being out of the water and that you have enough room for them to swim. You can use a net or a siphon hose to transfer your betta fish from their tank into the bowl. Once you have done this, you should now remove any decorations or plants in the bowl and clean it very well with some warm water.
Step 3: Detach Decorations
After you have cleaned your aquarium and prepared it, now is the time to detangle decorations or plants from contaminating the water. You can remove decoration gently with a pair of cleaning gloves since we are not dealing with adhesives here but shredded leaves which will absorb dirt and make the fish messy. It takes very little effort before removing decorations by using a pair of scissors and only cutting through one side while slowly disassembling them so that they do not break into pieces. You can also use a knife to cut the strings or ties that are holding the decorations in place. It is important to remove any decorations since they may obstruct full cleaning.
Step 4: Remove the Old Water
As you are removing decorations, remove the old water to allow it to drain. You can do this by filling a sink or tap with hot water while starting your siphon hose before beginning your cleaning process. When using a siphon system where connecting pipes pass through one another then there is no need for an external air bubbler, so just connect them and start drawing out the dirty water into another container as opposed to until all of it has been removed.
Step 5: Drain Remaining Water
Once all the water has been drained from your aquarium bowl, you can now clean it. Take a thin brush and scrub everything very well while flushing it with hot water to prevent any residual dirt or debris from being trapped inside of the tank. These bowls are typically used for betta fish that don’t need decorating but they work just fine if only used as an overflow top-off drain container; however, cleaning them is still important to remove any bacteria as well. Some folks put them away until they are full of water because they could break while washing the used ones. This is only recommended if you have a strong siphon system and there is no risk involved in doing so, otherwise, it might become too much effort that appears wasteful just on principle alone without gaining anything beneficial in return!
Step 6: Clean the Aquarium Decorations
Once the water is clean, all that remains to be done is to thoroughly scrub away any remaining dirty decoration that you have previously removed from your fish tank or bowl. You will want yours to look beautiful once it’s ready enough to be added again to your aquarium. Also, make sure to rinse it as well with cold water, this is extremely important especially if you plan on using your tank again in the immediate future. To get rid of any leftover soap residue or excessive dirt inside the plumbing tubes and connections then run hot water through it until fully rinsed away before draining that bowl when all has completed its job. This can substitute for having an air bubbler.
Step 7: Clean the Aquarium Gravel
Cleaning gravel can also be a tedious but necessary task when it comes to keeping your fish tank or bowl clean. Gravel is usually made of crushed-up ceramic or plastic pieces and can accumulate inside the plumbing tubes and connections of your aquarium, leaving it looking messy and dirty. Be sure to scrub away any dirt, bacteria, or debris that you find before rinsing the gravel off with cold water. When all is said and done, to dry it completely, apply the air bubbler which will have the gravel take on nothing more than a pleasant warm mist. Before doing so though make sure that you remove anything else that may be there such as your fish tank’s heater, filter cartridges, and any other decorative pieces that may cause damage in this case if they’re soaked by vibrations and heat.
Step 8: Clean the Aquarium Walls
To clean the aquarium walls, you will need some sort of cloth or sponge that is safe for use with water. Start by wetting the cloth or sponge and then using it to wipe down any dirty areas on the aquarium wall. Pay particular attention to around all of your fish tank’s openings as this is where debris and dirt tend to accumulate the most. Make sure to rinse off the cloth or sponge when you’re done and then leave it to dry, which will now be free of all water.
Step 9: Put Aquarium Decorations and Gravel Back
Once you’ve finished cleaning the aquarium walls, it is time to put the decorations and gravel back in place. Start by placing your fish tank or bowl back in its original location and then attaching all of its pieces using the screws, anchors, or suction cups that came with it. Next, take your cloth or sponge and wet it again before wiping down all of the surfaces around your aquarium including any glass panels that might be visible through it.
Step 10: Add New Water to the Aquarium
Now that everything is clean and dry, it’s time to add new water to your aquarium. To do this, open the tap all the way and then slowly start adding water until it reaches the level of your fish tank or bowl. Be careful not to spill any of it on yourself or damage anything in the process. Once you’ve added enough water, turn off the tap and wait for your aquarium or bowl to fill up again.
Step 11: Return Your Bettas
It’s time to put your fish back in their original places and return them all to the home of water that they came from. This will help you establish a good new ecosystem, much like being careful not to shake your aquarium or bowl too vigorously as it might hurt some fish species that are familiarizing themselves again to their newly-furnished home.

How Often Should You Clean a Betta Tank?
There should be no harm in cleaning the tank once or twice a month if you want to keep your home clean without compromising its safety. On average, though, fish living in glass tanks are required to stay well-cleaned as they can get severely sick whenever an accumulation of waste residue builds up over time and is not promptly removed properly. This will also help maintain healthy bacteria levels inside the aquarium so that diseases do not take root and threaten the health and life of your fish.